| Prowler Products By Gary | Tom Mills - Plymouth Prowler Parts |
 |
| Home Page | Owners Registry | Discussion Forums | ProwlerMall | Event Scrapbooks | About |
| Prowler Products By Gary | Tom Mills - Plymouth Prowler Parts |
|
 |
| ||||
| Want to register? | |||||
If you have previously registered, but forgotten your password, click here.
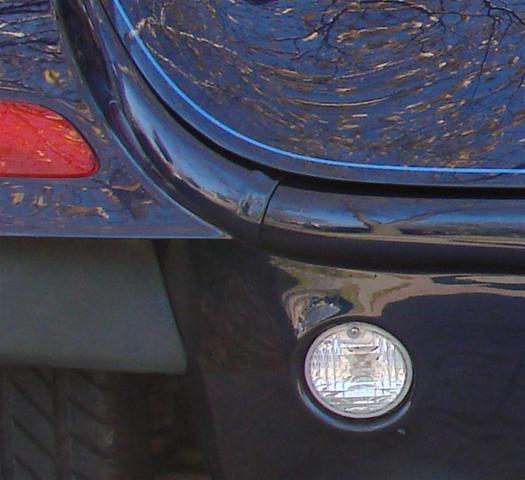
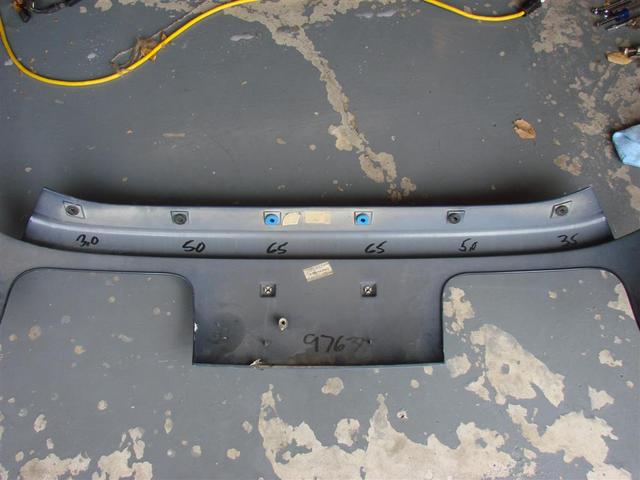
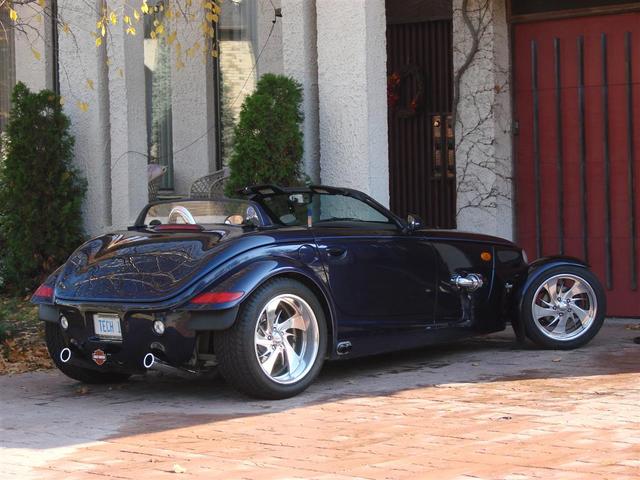
I bought a aftermarket Belly Pan from Tom Mills and decided to install it in my garage , I don't have a Lift.. All done on the ground without jacking up the Kat. Installing Tom Mills Belly Pan with is his Custom Trailer Hitch First, mask around the location of the hinges on the rear deck-lid to install them back in the same location (VERY Important) Remove rear Deck-Lid and store in safe place..(2 people required to do this) used 13mm wrench Removed seam filler with wife's hair dryer, go low, take Tom supplies new double sided tape to use when you reinstall Wrong way..seam exposed, install from bottom up Note: to install start at the bottom and work to the top....the rear deck-lid hides the top of the seam Remove OEM Belly Pan and note location of spacers to put them on the new Belly Pan. Notice the numbers put on at the Factory, they relate to the number of spacers (thickness) used to fill the gap between the frame and the OEM rear pan. Use contract cement or masking tape to hold them in place. Note: This will allow to to remove bumpers and OEM Trailer Note: My frame had all ready been drilled to install Next cut off the Exhaust tips or remove them to allow the new Pan to be fitted This message has been edited by Northern Cat on 11-14-2008 at 08:31 AM Note: I removed the bumpers without removing the OEM belly pan...It can be done, but much easier to do with the rear-deck and the OEM belly pan removed. to save yourself a lot of time, this would be the best way if you wanted to send your bumpers out to be painted and save yourself a lot money on labour cost. Cut off 1 inch pass the hangers or remove the Borla exhaust Note: you have to do this to install the new Pan without damaging it. Your now ready to install the new Belly Pan This message has been edited by Northern Cat on 11-10-2008 at 11:17 AM Tom supplies new double tape to use when you reinstall Note: start at the bottom and work to the top....the rear deck-lid hides the top of the seam I then installed the 2 straps on the bottom of the pan Job Done This message has been edited by Northern Cat on 11-10-2008 at 11:24 AM This message has been edited by Northern Cat on 11-10-2008 at 08:57 PM (PS - was the price I paid you for your old pan the "installed" price?) Not sure if that belly pan (TGF), fits on top of the OEM pan Why not have a belly pan install party..buy the Pizza Don This message has been edited by Northern Cat on 11-09-2008 at 07:59 PM Willie Looks Good, quality product, great pictorial on installation Step by Step Tom Mills and Gary E make great after market parts for sure Don McCormack This message has been edited by Don McCormack on 08-08-2009 at 05:06 PM ------------------ Note: I removed the bumpers without removing the OEM belly pan...It can be done, but much easier to do with the rear-deck and the OEM belly pan removed. to save yourself a lot of time, this would be the best way if you wanted to send your bumpers out to be painted and save yourself a lot money on labour cost. Cut off 1 inch pass the hangers or remove the Borla exhaust Note: you have to do this to install the new Pan without damaging it. Your now ready to install the new Belly Pan ------------------ dwmcormack@gmail.com ------------------ dwmcormack@gmail.comNorthern Cat Preamble: 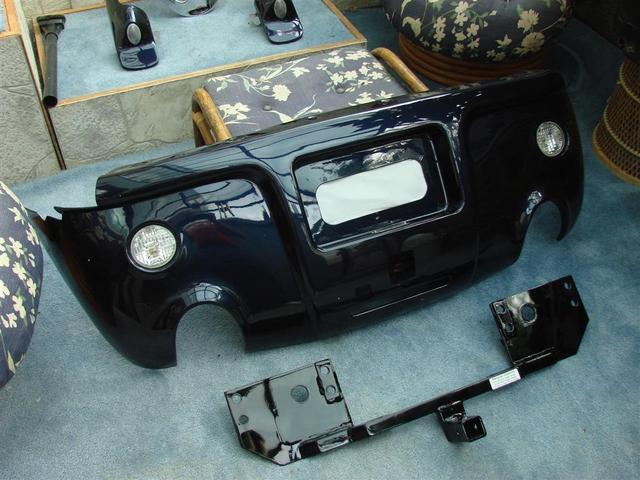
your time. Clean off the old double sided tape as best you
can before using new double-sided tape
the seam filler piece, 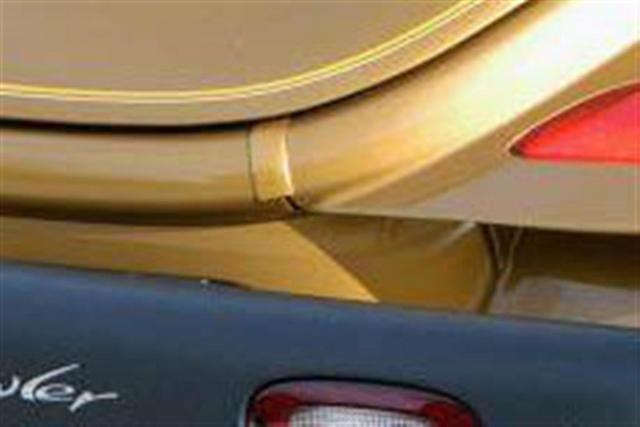
Hitch a lot easier or to install a a new trailer hitch, if that's what your going to do..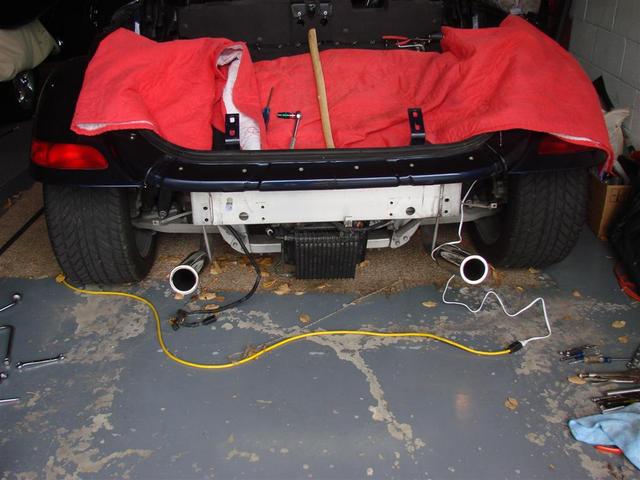
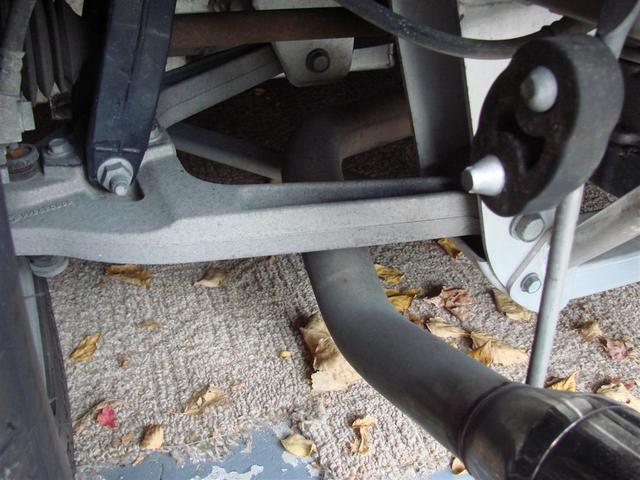
the trailer hitch...you will have to do this if it's a new install of hitchNorthern Cat Installed the new Trailer Hitch with no problems.
Tom includes all new hardware which was better quality than the OEM hard-ware.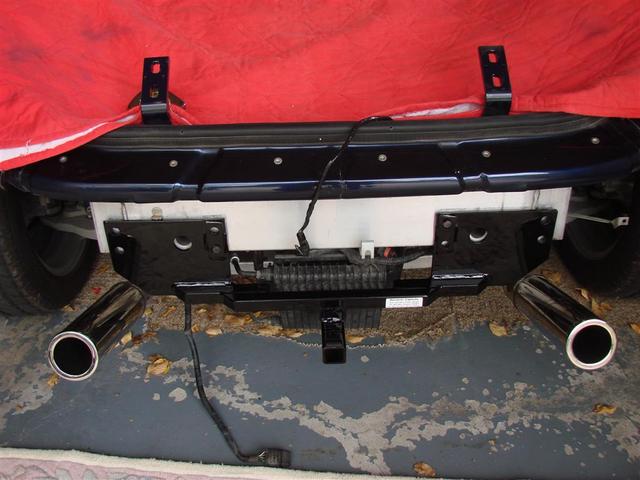
to install the new Pan. 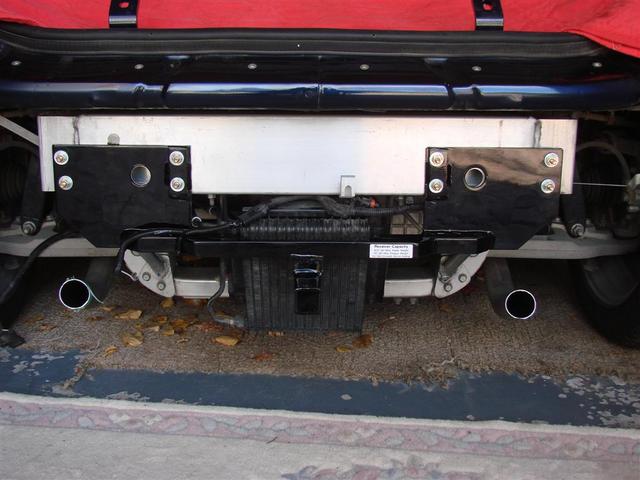
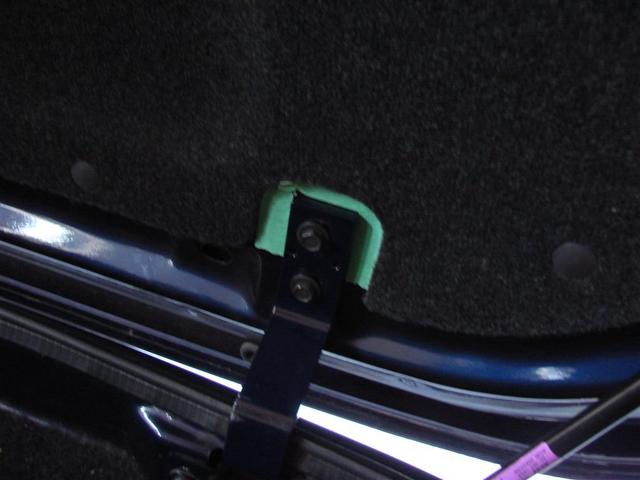
Northern Cat Install the new Pan, and loosely fit all the bolts along the top adjust for best fit, then tighten down
the seam filler piece,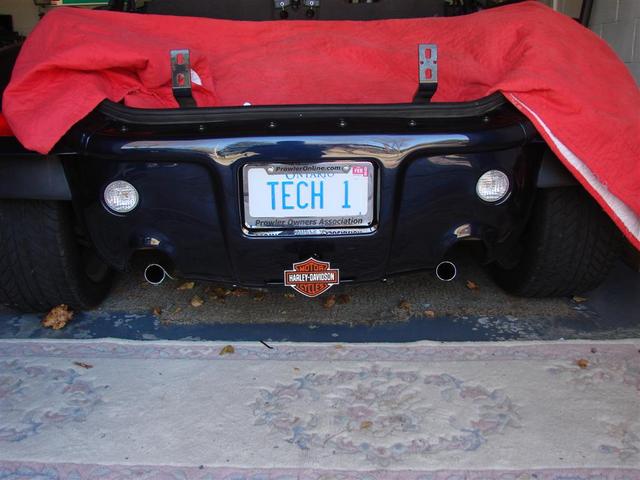
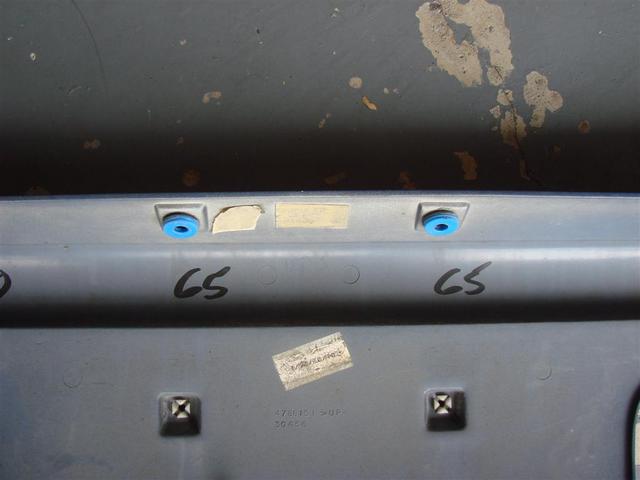
and attached them to the Frame
I then took the cut-off Borla tips over to my local shop,
had them remove the cut ends, center the pipes on the Belly
Pan and slide the tips down for the best look, tacked them on..installed new hangers on the tips ..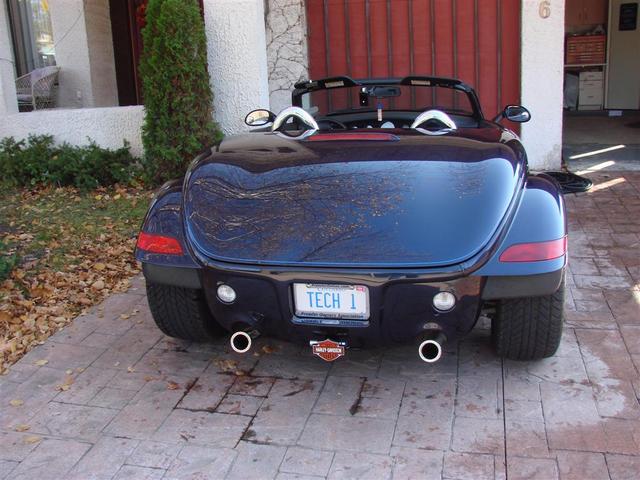
Northern Cat No special tools required...no lift..Only had to have the Borla tips reinstalled at the shop by a Pro 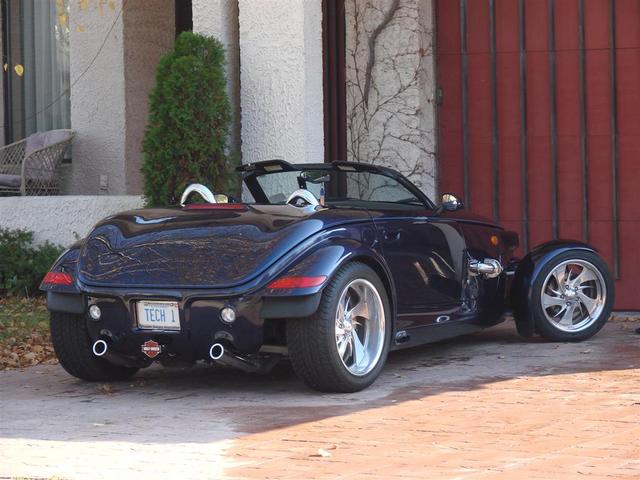
Thanks TomNorthern Cat Total installation cost $50.00 to realign exhaust and cut the Borla tips 
Wayne Finch Lookin good Don. Nice install. Northern Cat Wayne, I looked at the TGF pan (for use with bumpers) when I was at Darren's
and didn't see any top holes to fit it ..
with double sided tape
and we can all help with it..toys Don
Great pics of the install Thanks for the post.
toysWildCat Don, Northern Cat Yes, this Belly Pan from Tom Mills and the new Chrome Grill
from GaryE are as good or better quality than the OEM pieces.
Don..Northern Cat GaryE's Grill 
Don McCormack Seems people are interested in another one of my projects
I did in my Garage with no Lift...Here you go...LAwil Sharp looking kat Don. I just love the mods. 
Don McCormack Thanks Wil.....I went though this again and
since I cannot edit my old posts, I though I would just clarify about cutting the pipe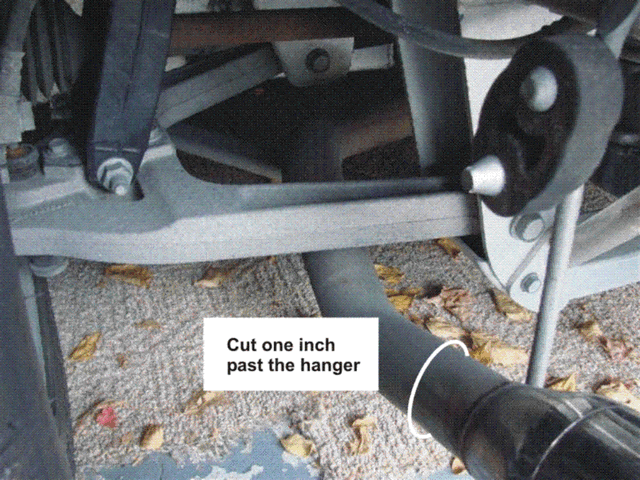
quote:
Originally posted by Northern Cat:
Installed the new Trailer Hitch with no problems.
Tom includes all new hardware which was better quality than the OEM hard-ware.
to install the new Pan.
CELLOMETRICS 
broakie56  Hi Don.....Awesome post, pics and details! Again, just wanted to say how much I love those wheels and intake on your Cat......absolutely beautiful! Drooling with envy!
Don McCormack Brought this to the top for those interested in installing their own Belly Pan, in this case "Tom Mills" Pan
CELLOMETRICS
All material contained herein, Copyright 2000 - 2020