
| Forum: | General Prowler Discussion |
| Topic: | Once again everyone...Thank You!!! |
| Home Page | Owners Registry | Discussion Forums | ProwlerMall | Event Scrapbooks | About |
|
|
| ||||
| Want to register? | |||||
If you have previously registered, but forgotten your password, click here.
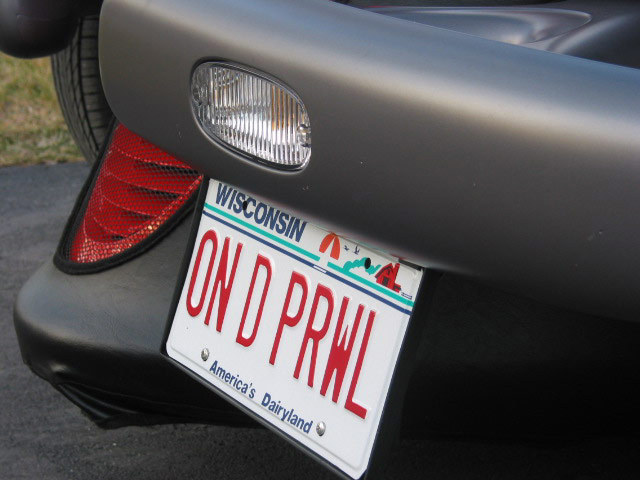
Brian, yes, they are still available. I have attached some pix of the Prowler PlateMount. It is made using laser cut stainless steel and 3M’s most reliable DualLock product which allows you remove and remount the PlateMount many times, if preferred. Cost is $69.95 prepaid to 48 states. Freight quoted for Canada, Alaska, or Hawaii. Mail your personal check to: Paul I am also including the pics that Paul sent to me showing several views on this bracket. I am passing on this great information to everyone just as GenoTex did for me. Just in case a cop gets on anyone else's case about not having a front plate. Brian GRROWL is a 2000 Yellow Prowler. I have benefitted from the online discussion boards from day one (June 2000) and figured it's time to give something back. It always bothered me that they drilled into the bumper to mount the front plate, so at least there was some benefit when (out in left field at Office Depot, away from all other cars) some kid zipping around in a BMW snagged the bumper from behind and folded it into the grill. Those front bumpers really collapse when hit from behind. Soooo, while I was waiting for the new bumper to arrive, I did a post-mortem on the old one. Being off of the car and upside down on the workbench, it sure seems that Plymouth designed the bumper to take a front license plate mount the way I will describe below. Came back to edit and add a picture: But first, a plug - and a thank you. As I said, I have benefited from this board in the past and ordered a new replacement bumper at a SUBSTANTIAL savings - THANKS, ALLEY CAT - those guys at John Youngblood Motors are phenomenal - and to get Mopar parts at such a discount is unheard of. Anyone interested should do a search for "cheap parts" posted by Alley Cat (by way of coincidence, my wife's pet cat is named Alley Cat). Back to the subject: Under the bumper, there is a recess approximately 1/2" deep and 1" wide with a row of pop rivets. The rivets attach 2 layers of plastic (front and back of bumper shell) to an aluminum box-beam. The location of the plate looked best (at least to me and to my wife - she's not particularly fond of GRROWL, and I'm not particularly fond of Alley Cat - her pet, not the POA member) centered under the directional signal. Coincidentally, two rivets are equally spaced from the centerline of the signal with matching holes on the top of the box beam, which is EASILY accessible by removing the directional signal (2 screws as if you were replacing the bulb). This is a CHEAP, GOOD and NO COMPROMISE solution. I believe that the end result is PERFECT (providing, of course, that the law requires you to have a front plate to start with). I dug the following out of my scrap box: 1 pc - 1" x 2" aluminum angle, 9" long This is really starting to sound much more complicated than it is. This is a 15-minute job requiring only an electric drill with a 1/4" bit and a portable belt sander or grinder. Here's the procedure: ---------------------- 1. Drill out the 2 pop rivets below the directional signal (all drilling is with a 1/4" bit). 2. Remove the directional signal as if you were replacing the bulb, just let it hang. Drop in 2 bolts (1/4" x 1-1/2") down through the holes you will find behind the signal and out through the pop-rivet holes. 3. Find a piece of 9" long 1" x 2" angle in your choice of materials. Contour the 1" edge to match the front curve of the groove under the bumper (the 2" face will then be hanging down at the rear. 4. Center the bracket below the light opening, drill 2 holes to match the new bolts (should be 5" apart, but check), and bolt on. 5. Drill 2 holes, 1/4", 7" apart, and bolt on the license plate. 6. Re-install the signal. Done! --------------------- Additional (overly complicated) points: A. No metal-working-specific tools were used in the production of this bracket. The portable belt sander worked well with an emory belt to contour the aluminum angle (which was 1/8" thick, by the way), round all of the corners, and ease the edges. I also used it to sand the faces to produce a "brushed" finish. B. You could just as well use stainless steel angle (if you can find it); plastic angle; or bend sheet-metal of your choice. You could also attach with pop-rivets (skip steps 2 and 6) or screw into the pop-rivet holes with 5/16" self-tapping screws. Again, this is over-complicating the issue for such an easy (and good) fix. C. You probably want to stiffen up the plate - I used a clear cover that did the job nicely. You could also use a backer, either the original mount, sheet-metal, plastic or whatever.TooHipCat GenoTex and I have been going back and forth with PM's...in addition to everyone else's advice on what to do about installing a front license plate bracket. He even offered to kindly lend me a front license plate bracket for my 97 Cat. I in turn asked him if the bracket was still available that he was referring to. Please see the e-mail I received below from Paul who is also a member of this fantastic POA community:
Tectrum Sales and Associates
N25 W5280 Polk St.
Cedarburg, WI 53012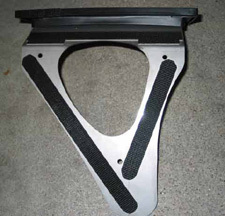

Once again this great POA community has come through. I hate to keep repeating myself but you guys are the GREATEST!!!

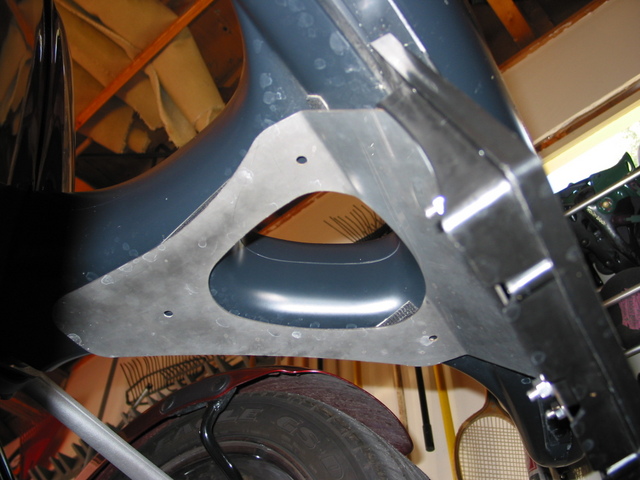
Paul Wouldn't you know it, a Prowler owner with a water-spotted bumper....from the bottom, of course. Sorry about that underside shot. I didn't know it would be posted for everyone but I hope you get the idea despite the ugly garage walls and the water spots under the front bumper. GenoTex is my best salesman. I'm gonna' have to start paying him a commmission. Thanks Mr. Gene! GenoTex Always A Pleasure, Paul. Great products are Always easy sales 
ZRed99 Does the dual lock really hold it in place? I would worry too much about it blowing off. Can it be fastened with screws? GenoTex Yes it does hold........... and part of the 'point' of using it is to avoid screws/drilling of any kind in the car. 
GRROWL quote:
Originally posted by ZRed99:
Can it be fastened with screws?
quote:
Originally posted by GRROWL on 3/10/2002:
This is my first post, so be kind.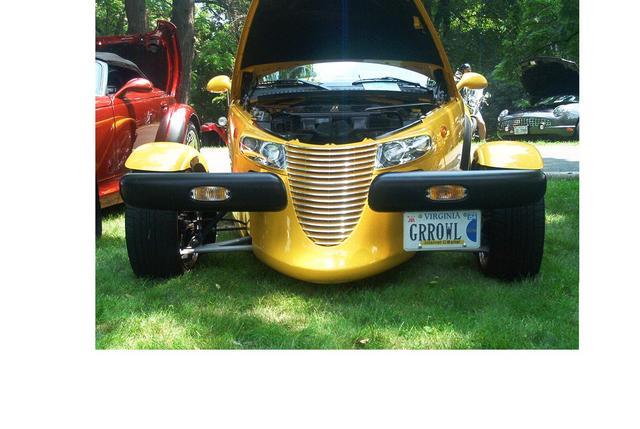
2 pc - 1/4" x 1-1/2" hex bolt
2 pc - 1/4" acorn lock nuts GRROWL This is really starting to sound much more complicated than it is. This is a 15-minute job requiring only an electric drill with a 1/4" bit and a portable belt sander or grinder. Here's the procedure:
All material contained herein, Copyright 2000 - 2020